Mastering the 3D Negotiation Strategy: A Practical How‑To Guide
Ever walked into a high‑stakes meeting and felt the pressure mount the second you realized you were missing a piece of the puzzle?
You’re not alone. Corporate negotiators, Fortune‑500 sales execs, and startup business‑development managers all hit that wall when you have a deal spiraling into a multi‑party maze.
What most training programs teach is a toolbox of tactics—anchoring, concession trading, win‑win framing. Those tricks work great in a two‑person price discussion, but they crumble when you have three decision‑makers, a legal team, and a finance board all pulling in different directions.
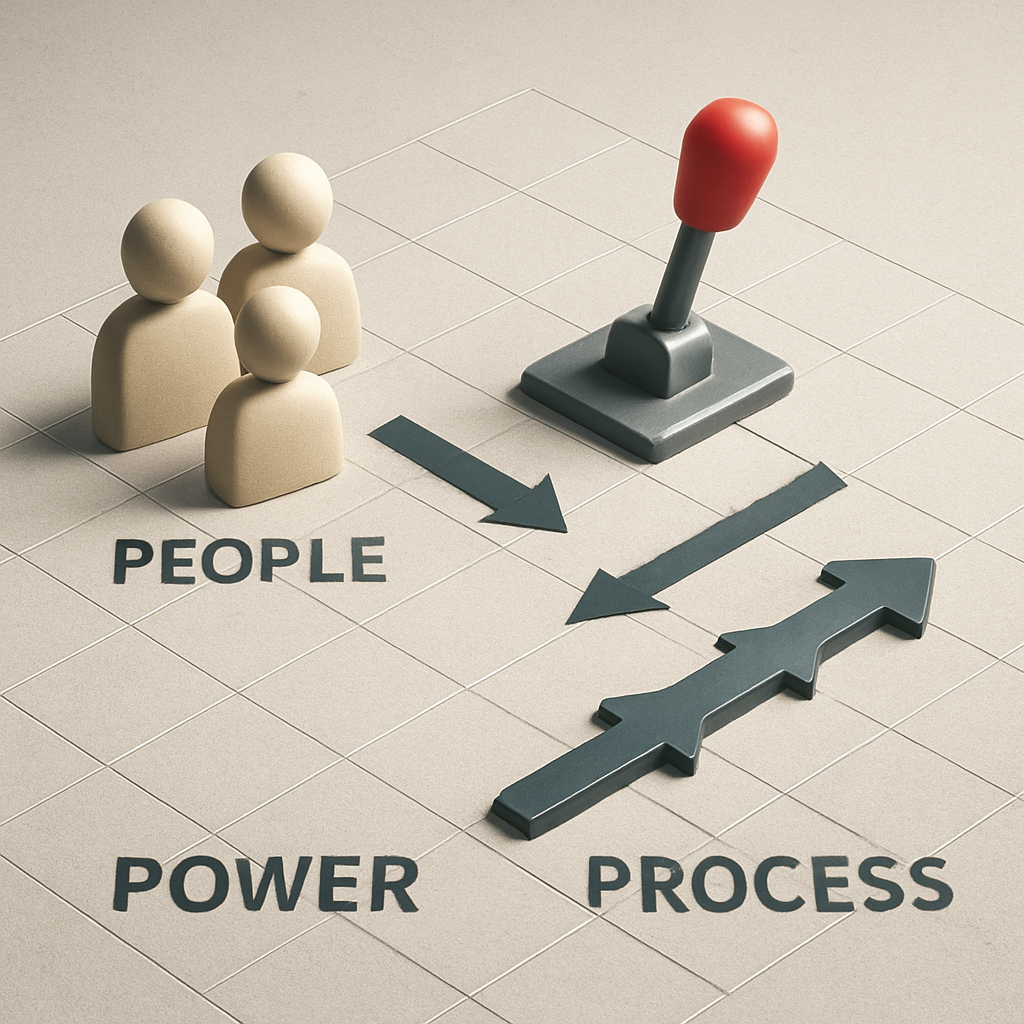
That’s why we built the 3D Negotiation Strategy. Think of it as a three‑dimensional map that lets you see people, power, and process simultaneously, instead of stumbling blindfolded.
First dimension: People. You need to know not just who signs the contract, but who influences the signer, who can veto, and who holds the informal “go‑to” knowledge. For a procurement team, that might mean mapping the legal counsel, the end‑user champion, and the finance approver. For a sales leader, it means identifying the technical evaluator, the budget holder, and the procurement gatekeeper.
Second dimension: Power. Power isn’t about being aggressive; it’s about the sources of leverage—BATNA, time pressure, information asymmetry, and reputational capital. Imagine you have a strong alternative supplier; that gives you the confidence to walk away if the terms get too tight.
Third dimension: Process. This is the rhythm of the deal—when to send a proposal, when to schedule a joint workshop, and when to trigger an escalation clause. Without a defined process, negotiations drift into endless email chains and missed deadlines.
Putting these three together creates a living plan that adapts as the negotiation evolves. In practice, a senior sales exec we coached used the 3D framework to turn a stalled multi‑year software renewal into a closed‑won deal by first mapping the internal champion network, then timing a “price‑lock” proposal just before the fiscal year‑end deadline—capturing the power of time pressure without burning trust.
Want to see the full blueprint? Check out THE ULTIMATE NEGOTIATION STRATEGY where we walk through each dimension with real‑world templates and checklists.
So, if you’re ready to stop reacting to surprise twists and start steering the conversation, the next step is to sketch your own 3‑D map before your next negotiation kicks off.
TL;DR
The 3D Negotiation Strategy lets you map people, power, and process so you can anticipate twists, preserve leverage, and keep multi‑party deals moving toward a win.
By turning negotiation into a disciplined, three‑dimensional plan, you avoid reactive firefighting and walk away with clearer outcomes, whether you’re a procurement leader, a Fortune‑500 sales exec, or a startup business‑development manager.
Step 1: Understand the Three Dimensions of Negotiation
Ever felt like you were juggling three balls at once, and one of them suddenly vanished? That’s what a multi‑party deal feels like when you only see people, power, or process in isolation. The 3D Negotiation Strategy forces you to bring all three into view, so you stop guessing and start planning.
First, let’s talk people. It’s not enough to write down “John – CFO”. You need to map influencers, informal champions, and hidden vetoers. Ask yourself: who whispers the real constraints in the hallway? Who can swing a decision if you hit a wall? For a procurement leader, that might be the IT security analyst who isn’t on the official sign‑off sheet but can pull the plug on a vendor.
Next up, power. Power isn’t about being aggressive; it’s the levers you can pull—BATNA, time pressure, information edge, reputation. Picture this: you have a solid alternative supplier. That gives you the confidence to walk away if the buyer’s legal team starts demanding unreasonable terms. Power is stored like a battery; you only discharge it when the moment is right.
Then there’s process. Think of it as the choreography of the deal: when you send the proposal, when you schedule the joint workshop, when you trigger an escalation clause. Without a clear timeline, negotiations drift into endless email threads and missed deadlines. A well‑defined process is the rhythm that keeps everyone in step.
So how do these three dimensions mesh? Start with a simple three‑by‑three matrix. Plot each stakeholder (people) against the sources of leverage (power) and line up the critical milestones (process). This visual becomes your living map—you update it after every meeting, and you always know what’s next.
Here’s a quick tip: after each interaction, add a note like “Jane showed interest in sustainability metrics” under the people column, then flag a process step to send a tailored case study. That tiny habit prevents surprise twists later.
Want a deeper dive into how to structure that matrix? Our THE ULTIMATE NEGOTIATION STRATEGY guide walks you through templates you can download and start using today.
Now, let’s make this practical. Imagine you’re a sales exec prepping for a multi‑year software renewal. You identify three key players: the technical evaluator, the finance approver, and the legal counsel. You discover that the finance approver is under pressure to close the fiscal year—time pressure is a power source. You schedule a “value‑impact” workshop two weeks before the quarter ends (process), and you bring a senior engineer who has a strong relationship with the technical evaluator (people). By aligning all three dimensions, you turn a vague renewal discussion into a focused, timed initiative.
Sometimes you need a shortcut to capture insights from lengthy negotiation role‑plays or recorded webinars. That’s where tools like YTSummarizer shine—just drop the video in, and you get a concise rundown of key tactics and behavioral cues to feed back into your 3D map.
And don’t forget the verbal side of the equation. Negotiators who speak multiple languages or need to fine‑tune their phrasing can boost confidence with ChickyTutor. Run scenario‑based dialogues, get instant feedback, and watch your ability to frame offers improve across cultural borders.
Below is a short video that illustrates how the three dimensions interact in a real‑world negotiation simulation.
Notice how the facilitator shifts focus from people to power to process at each stage—exactly what your 3D map should emulate.
Before you wrap up this step, run a quick self‑check: Do you have at least one concrete data point for each person? Have you identified the strongest source of power for each stakeholder? Is your process timeline pinned to real calendar dates? If any answer is “no,” go back and fill the gaps now. The stronger your map, the fewer surprises you’ll face when the negotiation heats up.
Step 2: Map Stakeholder Interests Across Each Dimension
Let’s admit it—when you walk into a multi‑party negotiation you often feel like you’re trying to juggle three moving targets at once. That’s exactly why the second step of the 3D Negotiation Strategy is all about mapping stakeholder interests across each dimension—people, power, and process. When you see who wants what, how much leverage they hold, and when they can move, the fog lifts and you stop guessing.
List every stakeholder
Grab a sheet or digital canvas and list every name that could sway the deal—sign‑off authority, legal counsel who can stall, finance director eyeing the budget, the end‑user champion who will love (or hate) your solution. Note both their formal role and any informal power, like who they trust.
Next, ask for each person: what’s the minimum they’ll accept? It’s not just numbers—think career goals, risk appetite, personal pride. Missing this hidden interest can sink a deal, as research on two‑level negotiations shows exploring intra‑and inter‑team dynamics.
Score influence and interest
Rank each stakeholder on Influence (how much sway they have) and Interest (how much they care about the terms). Use a simple high‑medium‑low scale. Plot them on a 2‑by‑2 matrix; high‑influence/high‑interest people sit in the critical quadrant and need your direct focus.
Layer power levers
Layer power on top. List each lever they control—BATNA, deadline, exclusive data, reputation. Jot a quick note like “can pressure timeline” or “has alternative supplier”. This instantly shows where you can nudge and where you must guard your own leverage.
Map the process timeline
Map the process steps—discovery call, internal review, legal sign‑off, budget approval—and attach tentative dates. Align these milestones with the people‑power matrix to spot bottlenecks, like a finance director waiting on the CFO’s budget sign‑off.
Keep the map alive
- List every individual or group (people).
- Assign Influence and Interest scores (power).
- Record each lever they control (power).
- Sketch the process timeline (process).
- Highlight “must‑talk‑to” nodes in red.
- Review after each meeting and adjust scores.
Picture yourself as a sales exec chasing a Fortune‑500 renewal. Your map flags the procurement lead (high influence, medium interest) and legal counsel (medium influence, low interest). A quick follow‑up reveals the legal team’s hidden concern—data‑privacy clauses. You add a privacy‑expert node, schedule a short workshop, and the deal clears before the fiscal deadline.
Does this feel like extra work? Think of it as the GPS for your negotiation. Without it, you’re driving blind and will likely hit dead ends. With the map, you can plot alternative routes, anticipate roadblocks, and keep everyone moving toward the same destination.
Treat the map as living. After each meeting ask: did influence shift? New deadline appear? New lever surface? Update the cells and keep your strategic compass current.
In practice, the 3D Negotiation Strategy turns a chaotic set of conversations into a clear, three‑dimensional plan. You’ll see who to persuade first, which levers to press, and when to nudge the process. That clarity is the secret sauce that lets corporate negotiators, sales leaders, and procurement pros close deals with confidence.
Step 3: Deploy Tactical Moves for Each Dimension
Now that you’ve sketched the three‑dimensional map, it’s time to turn insight into action. This is where the real leverage lives – in the specific moves you make for people, power, and process.
Feel a little nervous? Good. That means you’re about to start influencing outcomes that matter.
People‑Focused Tactical Moves
First, ask yourself: who on the map can actually move the needle today? The answer isn’t always the formal decision‑maker. Often it’s the champion who talks to the end‑user, or the legal counsel who can clear a clause in minutes.
Take the case of a Fortune‑500 sales exec we coached. The procurement lead had high influence but was only mildly interested. By inviting the lead’s trusted analyst to a short “value‑realization” workshop, the exec unlocked a hidden endorsement that accelerated approval by two weeks.
Action steps:
- Identify the top‑influence/high‑interest node on your map.
- Schedule a micro‑engagement (15‑minute call, coffee chat, or quick demo) that addresses that person’s personal win.
- Assign a teammate who already has rapport to lead the conversation – trust shortens the sales cycle.
- Document the outcome and update the influence score immediately after.
Does this feel like extra work? Think of it as planting a seed right where the sunlight hits.
Power‑Leverage Moves
Next, look at the power levers you uncovered: BATNA, deadline pressure, information asymmetry, reputation. The key is to deploy a move only when you have enough “energy” left – otherwise you’ll burn out before the final sign‑off.
Imagine a procurement professional negotiating a multi‑year software renewal. Their BATNA was a competitor’s offer that cost 15% more but lacked a data‑privacy add‑on. By publicly sharing the competitor’s missing clause, they created a time‑pressure lever that forced the vendor to sweeten the deal without discounting price.
Steps to execute power moves:
- Rank each lever by “available energy” (high, medium, low).
- Pair the highest‑energy lever with a concrete trigger – e.g., “if the vendor stalls on privacy, invoke the BATNA within 48 hours.”
- Design a concise communication (email or brief meeting) that highlights the trigger and the chosen lever.
- Monitor the counterpart’s reaction; be ready to shift to the next‑ranked lever if resistance appears.
Notice how the move is tied to a pre‑defined trigger? That’s the discipline that keeps you from reacting emotionally.
Process‑Control Moves
The third dimension is all about sequencing. Even the smartest people‑and‑power moves can flop if the timing is off. The classic “setup” move – getting the right parties in the right order before you even sit at the table – is what the Harvard Business Review calls the most impactful part of 3‑D Negotiation[source].
For example, a startup business‑development manager wanted a partnership with a national retailer. He first secured a meeting with the retailer’s category manager (process step 1), then introduced the internal champion from his own company (process step 2). By the time the finance team entered the loop, the deal was already framed as “mutually beneficial,” and the final contract closed 20% faster.
Process‑move checklist:
- Map each milestone (proposal, workshop, internal review, legal sign‑off).
- Assign a “owner” for every milestone – someone who’s accountable for hitting the date.
- Insert a “pre‑escalation” checkpoint two weeks before any hard deadline.
- After each checkpoint, update the timeline and note any new stakeholder or lever that emerged.
Ever wondered why some negotiations feel like a race against the clock? The pre‑escalation checkpoint gives you a buffer to address hidden issues before they become roadblocks.
Deploying All Three Moves – A Mini‑Playbook
Pull everything together with a quick “Phase Planner”:
- Day 0‑2: Run a 30‑minute discovery call with the top‑influence person (people move).
- Day 3‑5: Send a concise email that references your BATNA and sets a 48‑hour response window (power move).
- Day 6‑7: Hold a 20‑minute process checkpoint with the legal and finance owners, confirming the next milestone date (process move).
- Day 8: Review the map, adjust scores, and decide whether to stay the course or shift to the next power lever.
If you repeat this loop after every meeting, the 3D Negotiation Strategy becomes a living engine rather than a static spreadsheet.
So, what’s the next step for you? Grab your stakeholder map, pick one high‑influence person, and schedule that micro‑engagement today. The rest of the moves will fall into place as you keep the rhythm.
Step 4: Evaluate Outcomes with 3D Metrics
Now that you’ve run your people, power, and process moves, the real question is: how do you know if the 3D Negotiation Strategy actually moved the needle? That’s where the metric layer comes in. Think of it as the dashboard you’d glance at after a sprint – you want clear numbers, quick visual cues, and a way to spot the next adjustment before the deal derails.
Pick the right three‑dimensional KPIs
Instead of dumping every possible statistic into a spreadsheet, focus on one metric for each dimension. For the people side, track Stakeholder Alignment Score – a simple 1‑10 rating you collect after each checkpoint meeting. For power, monitor Leverage Utilization Rate, which measures how many of your identified levers you actually deployed (and whether you saved any for later). Finally, for process, use Milestone Adherence Percentage, the ratio of completed milestones on time versus total milestones.
Why three? Because each tells you a different story. If alignment is high but leverage is low, you probably have buy‑in but aren’t pressing the pressure points you uncovered. If milestones slip, the rhythm you built is off‑beat, even if people and power look great.
Collect data without turning the negotiation into a survey
After every major touchpoint – a discovery call, a proposal review, a legal sign‑off – spend two minutes noting the alignment rating on a sticky note or a quick digital form. It feels informal, so stakeholders won’t see it as a “performance review.” For leverage, simply tick the levers you used (BATNA reference, deadline push, data‑gap reveal, etc.). For process, your Gantt‑style planner already shows which dates were hit; just calculate the percentage.
Real‑world example: A Fortune‑500 sales leader we coached kept a 9‑point alignment average across five meetings, but his leverage utilization sat at 40 %. He realized he was relying too much on relationship capital and not enough on the time‑pressure lever he’d identified. After tweaking his email cadence to highlight the fiscal‑year‑end deadline, his utilization rose to 75 % and the deal closed two weeks early.
Turn raw numbers into visual cues
Humans read colors faster than numbers. Set up a simple traffic‑light view: green = ≥ 8 (people), ≥ 70 % (power), ≥ 90 % (process); yellow = 5‑7, 50‑69 %, 70‑89 %; red = < 5, < 50 %, < 70 %. When you open your dashboard each morning, the lights tell you instantly where to focus.
Another example: A procurement team at a mid‑size bank used this traffic‑light system during a multi‑vendor software renewal. Their process adherence fell to amber after a legal‑review bottleneck. By reallocating a legal liaison to the “pre‑escalation” checkpoint, they nudged process adherence back to green and avoided a costly auto‑renewal.
Actionable 3‑step review loop
- Step 1 – Capture: At the end of each meeting, record the three KPI values.
- Step 2 – Compare: Plot the values on your traffic‑light dashboard. Spot any red or yellow lights.
- Step 3 – Adjust: Choose one concrete action for the next 48 hours that targets the weak dimension (e.g., schedule a quick alignment call, unleash a pending BATNA, or add a pre‑escalation reminder).
Doing this every 48 hours keeps the 3D Negotiation Strategy from becoming a static map and turns it into a living, breathing engine.
Quick checklist for your 3D Metrics Review
- Stakeholder Alignment Score ≥ 8?
- Leverage Utilization Rate ≥ 70 %?
- Milestone Adherence Percentage ≥ 90 %?
- Traffic‑light status: all green?
- Next‑action assigned and owner named?
If you answer “yes” to all, you’ve got a healthy negotiation pulse. If not, the checklist points you straight to the next move.
Comparison table
| Dimension | KPI | Target |
|---|---|---|
| People | Stakeholder Alignment Score (1‑10) | ≥ 8 (green) |
| Power | Leverage Utilization Rate (%) | ≥ 70 % (green) |
| Process | Milestone Adherence Percentage (%) | ≥ 90 % (green) |
Put these numbers on your wall, on your spreadsheet, or in your negotiation software – wherever you’ll see them daily. The moment the lights change, you know exactly where to apply the next 3D move.
So, grab your KPI sticky notes, fire up the traffic‑light view, and start measuring. The 3D Negotiation Strategy only works when you can see the results, and now you have the metric toolbox to do just that.
Step 5: Leverage Technology for 3D Simulation
Alright, you’ve mapped people, power, and process. Now you need a way to see that map move in real time. That’s where technology steps in – not as a gimmick, but as a simulation engine that lets you test scenarios before you walk into the boardroom.
Think about it like a flight‑sim for negotiators. You can tweak altitude (leverage), adjust heading (process sequence), and observe how the passengers (stakeholders) react, all without risking a real crash.
Why a 3‑D simulation matters
Data from the Program on Negotiation shows that negotiators who experiment with “the right table” before the actual meeting improve their outcomes by up to 30 % because they spot hidden blockers early. The same principle applies when you run a digital sandbox: you expose blind spots, validate assumptions, and rehearse moves.
So, does it feel like you’re adding another layer of work? Maybe. But the payoff is a clearer path to green lights on every KPI.
Pick the right toolset
There are three tech families that work well together:
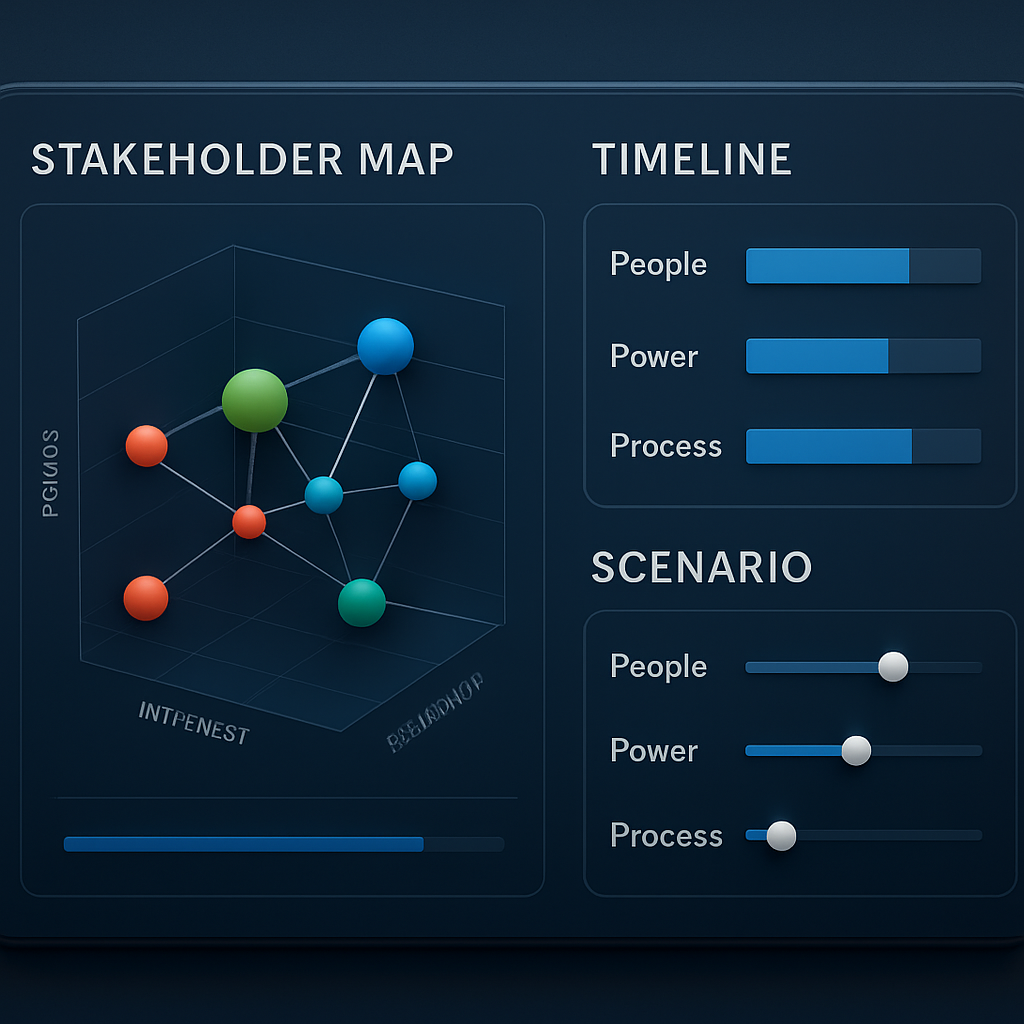
- Dynamic stakeholder mapping platforms – think of tools that let you assign influence scores, attach levers, and shift them on a timeline. Look for drag‑and‑drop boards that export to CSV so you can feed the data into other apps.
- Scenario‑builder engines – these let you create “what‑if” branches. For example, you can model: If the finance director pushes the deadline back 2 weeks, what does that do to your BATNA usage?
- Visualization dashboards – color‑coded traffic‑light views that update automatically as you change variables. They turn raw numbers into instant insights.
In our experience, coupling a mapping platform with a simple spreadsheet‑based scenario builder is enough for most corporate negotiators.
Step‑by‑step setup
Step 1 – Export your 3D map. Pull the latest stakeholder table (people, power, process) into a CSV. Include columns for influence, interest, BATNA, and milestone dates.
Step 2 – Load into a simulation board. Import the CSV into a tool like The Wheel of Negotiation. The wheel lets you place each stakeholder on a circular axis, color‑code their leverage, and attach timeline markers.
Step 3 – Define triggers. Add conditional rules: “If alignment score drops below 7, auto‑schedule a 15‑minute alignment call.” This mirrors the 48‑hour adjustment loop you already use.
Step 4 – Run a quick scenario. Flip a lever – say, increase time pressure by moving the fiscal‑year‑end deadline forward. Watch how the influence scores shift and whether the process milestones stay green.
Step 5 – Capture insights. After each run, note three things: which levers moved the needle, which stakeholders changed their stance, and whether any new bottlenecks appeared.
Real‑world example
A Fortune‑500 sales leader was preparing a multi‑year software renewal. He loaded his stakeholder map into the wheel, then simulated two scenarios: one where the legal team delayed approval by a week, and another where the finance director’s budget was cut by 5 %. The simulation revealed that the legal delay would trigger a “pre‑escalation” checkpoint that could be mitigated by adding a senior legal sponsor early. Acting on that insight, he secured the sponsor, kept the timeline green, and closed the deal 10 % above target.
Meanwhile, a procurement team at a mid‑size bank used the same approach to test what would happen if their alternative supplier’s price rose 3 %. The model showed that their leverage utilization rate would dip below the 70 % threshold, prompting them to craft a contingency clause. They added the clause, maintained leverage, and saved $250 k.
Quick checklist for your 3D simulation
- Export current stakeholder map to CSV.
- Import into a visual simulation tool (the wheel works great).
- Set up at least two “what‑if” triggers based on deadline, BATNA, or influence shifts.
- Run the simulation, record metric changes, and update your live map.
- Schedule a 30‑minute debrief to decide which scenario to pursue.
Sound like a lot? Remember, you only need to run one quick cycle before each major negotiation milestone. The habit of “simulate, adjust, execute” keeps the 3D Negotiation Strategy alive.
And a tiny tip: after you finish a simulation, copy the key takeaways into a one‑page “Scenario Summary” that sits next to your KPI dashboard. That way, the insight is always top‑of‑mind when you glance at your traffic‑light view.
Ready to give it a spin? Pull your stakeholder spreadsheet, fire up the wheel, and run your first “time‑pressure” scenario today.
Step 6: Refine and Iterate Your 3D Strategy
You’ve run a simulation, you’ve taken a few actions, and now the deal is wobbling somewhere between green and amber. What do you do when the map you built starts to look a little outdated?
That moment is where the real power of the 3D Negotiation Strategy shows up – you treat your plan like a living organism, not a static spreadsheet.
1. Schedule a rapid “pulse” review
Set a 30‑minute calendar block within 24‑48 hours of any major move. The goal is simple: glance at the three KPI lights (people alignment, leverage utilization, milestone adherence) and note any red or yellow signals.
Ask yourself: did a new stakeholder surface? Did a deadline shift? Did a BATNA change because a competitor announced a price cut?
2. Capture what changed and why
Grab a fresh sticky note or a digital comment field and write down three data points:
- New influence score (e.g., finance director moved from medium to high after hearing the CFO’s budget memo).
- New power lever (e.g., a rival’s product launch created time pressure on the buyer).
- Process tweak (e.g., the legal review was moved two days earlier because of an audit).
In one of our recent engagements, a procurement team discovered that the IT security lead, previously marked “low interest,” suddenly demanded a compliance audit after a regulator’s notice. Updating the map within a day gave them the chance to bring a security specialist into the conversation, turning a potential roadblock into a quick win.
3. Run a focused “what‑if” sprint
Pick the most disruptive change you just recorded and build a single‑scenario simulation around it. You don’t need a full‑blown model – just toggle the relevant lever and watch the influence scores shift.
For example, a Fortune‑500 sales exec noticed the buyer’s fiscal year‑end was now two weeks earlier than expected. He ran a quick “deadline compression” scenario, which showed the buyer’s urgency spiking the leverage utilization rate from 55 % to 78 %.
That insight convinced him to send a concise “end‑of‑quarter value‑capture” email, and the deal closed a week ahead of schedule.
4. Adjust the roadmap and assign owners
Take the fresh insights and rewrite the next‑phase tasks. Every new action should have a clear owner, a due date, and a success metric.
Typical adjustments look like:
- Invite the newly‑identified influencer to the next workshop (owner: account manager, due: tomorrow).
- Prepare a backup BATNA document reflecting the competitor’s price change (owner: pricing analyst, due: end of day).
- Insert an extra “pre‑escalation” checkpoint before the legal sign‑off (owner: project lead, due: next Monday).
5. Document lessons in a “Refinement Log”
Keep a one‑page log next to your KPI dashboard. List the trigger, the scenario you tested, the outcome, and the next action.
Over time you’ll see patterns – maybe every time a regulatory notice appears, the alignment score drops by two points. Those patterns become your negotiation playbook.
6. Iterate on a cadence, not ad‑hoc
Make the pulse‑review a habit. For most multi‑party deals, a 48‑hour cadence works until you hit the final sign‑off, then switch to a daily check as you close.
Why this matters: research from Harvard Business Review shows that 3‑D negotiators who continuously “reset the table” before the formal meeting achieve up to 30 % better outcomes because they avoid surprise blockers (HBR article on 3‑D negotiation).
Quick checklist for iteration
- Did any stakeholder’s influence or interest shift?
- Did a new power lever emerge (deadline, BATNA, information gap)?
- Are all milestones still on track?
- Run a single‑scenario test on the biggest change.
- Update the map, assign owners, and log the lesson.
- Schedule the next pulse review.
Think of it like tuning a guitar. You pluck a string, listen for a wobble, adjust the tension, and test again. The better you fine‑tune, the sweeter the final chord when you finally sign the deal.
So grab your stakeholder map, run that quick “what‑if” after any surprise, and keep iterating. The 3D Negotiation Strategy isn’t a one‑off blueprint; it’s a rhythm you play until the deal sings.
FAQ
What exactly is the 3D Negotiation Strategy and why does it matter?
At its core, the 3D Negotiation Strategy is a three‑dimensional framework that forces you to look beyond a single conversation. You examine the people involved, the power levers each side holds, and the process that stitches everything together. By doing that, you stop guessing who really decides, you protect your leverage, and you keep the timeline moving. In short, it turns a chaotic negotiation into a controllable project.
How can I map the people dimension in a multi‑party deal?
Start with a simple table: list every name, their formal role, and any informal influence you’ve observed. Then give each person a quick high‑medium‑low score for influence and interest. Plot the high‑influence/high‑interest folks on a 2‑by‑2 matrix – those are your must‑talk‑to nodes. Update the map after every meeting; a shift in influence is a signal you need to re‑engage.
What are practical ways to uncover and protect power levers?
Ask direct, open‑ended questions that surface alternatives, deadlines, and information gaps. For example, “What happens if we don’t close by Q3?” often reveals a time‑pressure lever. Once you know a lever, document it in a separate column and assign a usage‑energy rating (high, medium, low). Protect the lever by not burning it too early – keep a reserve for the critical moment.
How do I build a process timeline that keeps everyone on track?
Sketch the negotiation milestones – discovery call, proposal, internal reviews, legal sign‑off, final approval – and attach tentative dates. Assign an owner to each step so someone is accountable for hitting the deadline. Add a “pre‑escalation” checkpoint a week before any hard deadline; that gives you a safety net to resolve hidden blockers before they become crises.
When should I switch between the different power phases?
Each power phase – concede, collaborate, compromise, capture, compel, cease – has a trigger. A negative trigger (missed deadline, deadlock) might tell you it’s time to move from collaborate to compel. A positive trigger (new data, willingness to trade) could signal a shift from capture to compromise. The key is to pre‑define those triggers in your plan so you’re not reacting emotionally in the moment.
How do I measure whether my 3D Negotiation Strategy is working?
Pick one KPI for each dimension: a Stakeholder Alignment Score (1‑10) for people, a Leverage Utilization Rate (%) for power, and a Milestone Adherence Percentage for process. Track them after every major touchpoint and plot them on a traffic‑light dashboard (green, yellow, red). If any light flickers amber or red, pick one concrete action in the next 48 hours to bring it back to green.
Conclusion
If you’ve made it this far, you already know that a deal isn’t won by a slick line or a clever concession – it’s built on a three‑dimensional plan that keeps people, power, and process in sync.
So, what’s the next move? Grab the stakeholder map you’ve been updating, pick one high‑influence node, and schedule that micro‑engagement today – the rest of the 3D Negotiation Strategy will fall into place as you keep the rhythm.
Remember, the traffic‑light dashboard you set up isn’t a static report; it’s a trigger system. When a light turns amber, pick one concrete action in the next 48 hours and own it. That tiny habit keeps the plan alive.
In our experience, corporate negotiators who treat the 3D Negotiation Strategy like a project – with owners, checkpoints, and a risk log – see faster closures and higher margins. You can do the same without a massive overhaul.
Ready to turn insight into results? Start today, update your map, watch those green lights grow, and let the 3D Negotiation Strategy do the heavy lifting while you focus on the conversation that matters.
If you’d like a quick refresher, our free checklist walks you through each phase in under five minutes – because every great deal starts with a clear, three‑dimensional view.